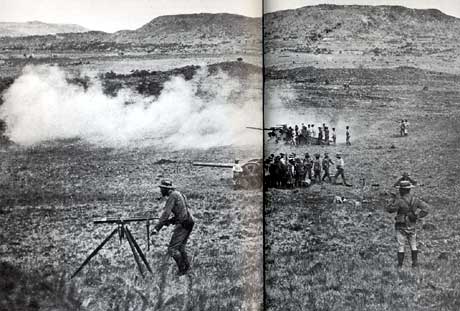
British naval guns at Vaalkrans
Map of Battle of Vaal Krantz by the Boer General BJ Viljoen
5 February 1900
Having withdrawn from Spioenkop, the British were taken back under the direct command of Sir Redvers Buller and another attack was undertaken to clear the Brakfontein ridge and open the way to Ladysmith. The key position of Vaalkrans Hill was taken in the afternoon of 5 February but turned out to be exposed to Boer fire from a 155mm Creusot (a Long Tom) to the south-east beyond the range of British counter-barrage. Calculating the cost of taking the ridge at between 2,000 and 3,000 men, Buller decided to withdraw. The plan to turn the Boer’s right flank had failed.
It is rare to have a record of the numbers of Boer forces at a particular action, but a map was made by Major F. W. von Wichmann of the Staatsartillerie, the officer commanding the artillery at Colenso on 5 February. He lists the Boer forces on the Upper Tugela, under General Shalk Burger, Assistant General T. Smuts and General Prinsloo, as the following commandos and men: Johannesburg, 400; Standerton, 300; Wakkerstroom, 100; Zoutpansberg, 110; Carolina, 300; Ermelo, 500; Heidelberg, 478; Lydenburg, 350; German Corps, 46; Artillery, 98; Pretoria, 300; Middelburg, 300; ZARP and other police, 600; Vrede, 110; Frankfort, 130; Senekal, 330; Heilbron, 210; and Kroonstad, 300. This amounted to a total of 4,962 men. The artillery consisted of one Creusot 155mm (Long Tom), three Creusot 75mm and three Krupp 75mm guns and three Maxim-Vickers guns. It is not specified whether these Maxims were .303 machine-guns or 37mm Pom-Poms. The map on which these listings appear shows the disposition of forces, Boer and British, on 5 February and the location of the Long Tom on Tala Hill, due east of Schiet Drift (Skietdrif).
The preparations for the British thrust took days, all under the eyes of the Boers beyond the Tugela. The plan was for Major-general A. S. Wynne, who had succeeded Woodgate, slain at Spioenkop, to take the Lancashire Brigade over Potgieter’s Drift towards Brakfontein Ridge. Meanwhile Major-general N. Lyttleton’s Brigade would cross over a pontoon bridge to be built at Munger’s Drift and take Vaalkrans itself. Then reinforcements would pass between Vaalkrans and the river to take the Boers on Brakfontein in the flank. Covering fire was to be provided by 12-pounder naval guns and two army 5-inch guns would be below Swartskop (Zwaarts Kop), while six 12-pounders would be carried up to the top of the hill. On Mount Alice, to the west, was the 4.7-inch naval gun. At 7 a.m. on 5 February Wynne crossed the river and engaged the
Boers ahead of him. Lyttleton’ men, 1st Durham Light Infantry and 3rd King’s Royal Rifles, had taken Vaalkrans by 4 p.m. and had dug in for the night. There they stayed all the next day, under steady shellfire from the Boer artillery, including the Long Tom which enfiladed the position, making it impossible to move the British guns onto the hill. The hill was also exposed to Boer rifle fire from Brakfontein and from Green Hill to the east. Major-general H. J. T. Hildyard’s Brigade relieved them that night, but by then Buller had decided that taking the ridge would be too costly. He telegraphed his Commander-in-Chief, Lord Roberts, to seek approval for this decision but in reply received vague exhortations to relieve Ladysmith, which contributed nothing. On 8 February the British started back to Chieveley with 333 men killed, wounded or missing. Buller’s awareness of the probable outcome when his artillery could not give sufficient cover to his infantry had saved many lives and signalled the beginning of a new tactical approach that would find fruition on the Tugela Heights two weeks later.
