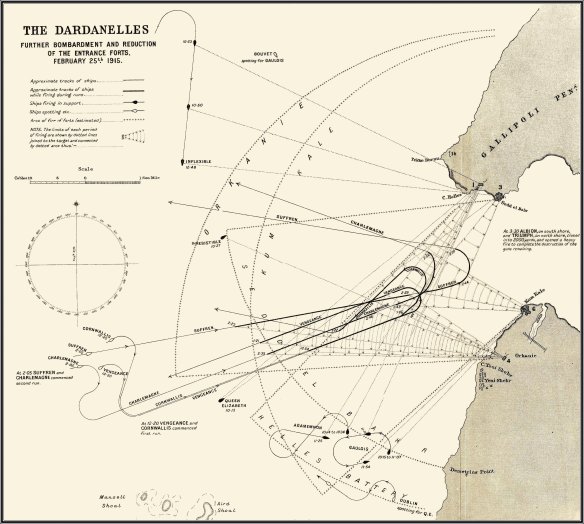
In 1915, the Entente launched naval and land operations to knock the Ottoman empire (Turkey) out of the war with a single decisive blow. The brainchild of the mercurial British First Lord of the Admiralty, Winston Churchill, the initial plan took advantage of the Entente’s naval superiority. Obsolescent Entente warships were to force the narrow Dardanelles Straits, after which warships could threaten the Turkish capital, Constantinople (Istanbul). An Anglo-French fleet assembled off the Gallipoli peninsula and in February–March 1915 it fought its way up the Dardanelles, in the face of fixed and mobile Turkish and German shore batteries, three shore-mounted torpedo-tubes and minefields. While the larger ships engaged the shore batteries, trawlers swept for mines. This was a slow process, with the capital ships retiring at dusk to return the following day. The naval force made steady progress, passing the outer forts, and was approaching the final set of defences at the Chanak (Canakkale) narrows on 18 March 1915 when it hit a recently laid undetected minefield. The French battleships Bouvet and Gaulois and the British Ocean, and the British battlecruisers Irresistible and Inflexible, were sunk, beached or badly damaged. The British admiral, John De Robeck, withdrew his fleet and on 22 March he met Ian Hamilton, in charge of land forces, to tell him that a naval assault was impossible. While bolder spirits pointed out how close they were to breaking through the Straits, with the Turks demoralised and low on ammunition, De Robeck’s cautious counsel prevailed and the British and French planned an amphibious assault on the Gallipoli peninsula.
For the difficult task of launching an amphibious assault, Hamilton had at his disposal six divisions: the British 29th Division and Royal Naval Division, two divisions of the Australian and New Zealand Army Corps (ANZAC), and two divisions of the French Corps expéditionnaire d’Orient. From 22 March to 25 April, these units gathered on the island of Lemnos, while Hamilton devised a hasty plan to assault Gallipoli. With poor intelligence on the Turks, and eschewing a landing at Bulair, Hamilton decided to make his main assault on the relatively flat tip of Cape Helles, with French forces making a diversionary landing at Kum Kale. The ANZACs would land at the one practicable landing site on the seaward side of the peninsula (famous as Anzac Cove) while the 29th Division landed at five sites from west to east around Cape Helles: Y, X, W, V and S beaches. Hamilton’s plan made little sense. His force was inadequate to clear the peninsula, but without doing this, the Turkish shore forts remained to bar the naval route to Istanbul. A landing at Bulair might have cut off the peninsula but Hamilton’s force was too weak to advance across the rough terrain separating Bulair from Istanbul. Only if the Turks chose to do nothing could Hamilton succeed. But forewarned of the preparations for an amphibious assault the Turks busied themselves building defensive works on Gallipoli, under the command of a German general, Otto Liman von Sanders.
On 25 April, an invasion armada gathered off Gallipoli. After a naval bombardment, steam-powered pinnaces towed boats full of troops ashore, casting them adrift close to the shore to be rowed to the beach. There was only one specialised landing ship with holes cut in her bows for landing troops, the old collier River Clyde, to be landed at V beach. The ANZAC troops got off to a bad start, landing 1.6 kilometres (1 mile) north of the planned landing site (for reasons which have never been properly explained) below steep, tangled bluffs. Unless the ANZACs could reach the crest of the high ground they ran the risk of being hemmed in, dominated by an enemy holding the high ground. In the dense gullies above their landing site, the ANZACs proved unable to dominate the high ground and were forced to establish a shallow defensive perimeter overlooked by the enemy.
While the landings at Kum Kale and Y, X and S beaches at Cape Helles were largely unopposed, at W and V beaches the few Turks present put up fierce resistance, raking the landing beaches with concentrated machine-gun fire with devastating results. But by the evening of the 25 April men were ashore at all the beaches. The Turks rushed the 19th Division to the area, under the command of Mustafa Kemal, to take up positions on the high ground. Helped by Hamilton’s lack of offensive momentum, Kemal’s men held the ANZACs, but were unable to push them off their beachhead. At Cape Helles, the 29th Division, reinforced by the French and the Royal Naval Division, attacked the village of Krithia, 6 kilometres (4 miles) inland. Soon western-front style trench deadlock set in as the British struggled unsuccessfully to take Krithia.
To break the deadlock, Hamilton devised a new amphibious assault at Suvla Bay for 6/7 August that would link up with an attack from Anzac Cove. But the new landing at Suvla Bay achieved little, a hastily assembled force led by Kemal blocking the dilatory British advance. After the Suvla Bay fiasco, Charles Monro replaced Hamilton and he recommended withdrawing from a lost battle. The British evacuated Suvla/Anzac Cove and Cape Helles (10 December 1915 to 8 January 1916), without a man being lost, the one successful part of the ill-fated campaign. Turkish casualties numbered some 300,000 to Entente losses of 265,000. Although their casualties were relatively slight, for the ANZACs Gallipoli became a symbol of their coming of age as nations; for the Turks, Gallipoli was a material triumph that saved their country; for the British, it was one of the most poorly mounted and ineptly controlled operations in modern British military history.
